photoshop简单制作箭头方法介绍
平面设计 发布日期:2025/2/19 浏览次数:1
正在浏览:photoshop简单制作箭头方法介绍
想要使用photoshop制作箭头效果,如何制作呢?下面就给大家举例讲解具体的使用photoshop制作箭头的方法,来看看吧!
步骤
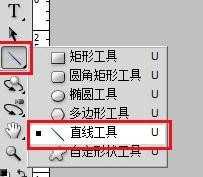
1、进入主界面,点击工具栏里面的“直线工具”
2、然后在选项栏中选第一张方式绘图,如图所示
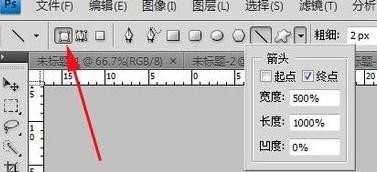
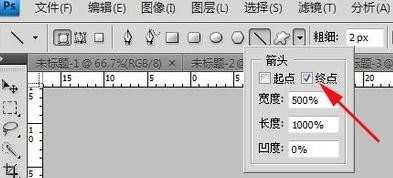
3、点击如图所示箭头,设置参数
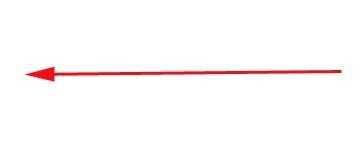
4、接着勾选起点(表示箭头是在鼠标开始绘制的起始点)
5、用鼠标从左至右绘制,如图所示就是绘制的效果
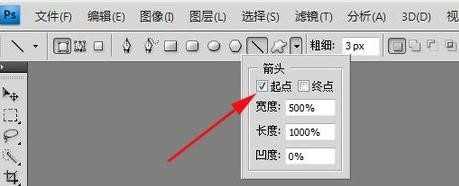
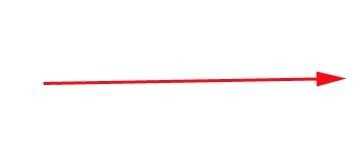
6、这里勾选终点,(表示箭头是在鼠标开始绘制的结束点)
7、接着用鼠标划一下查看效果
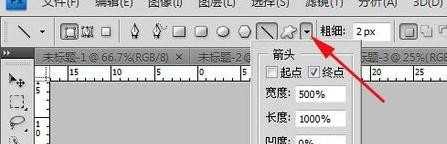
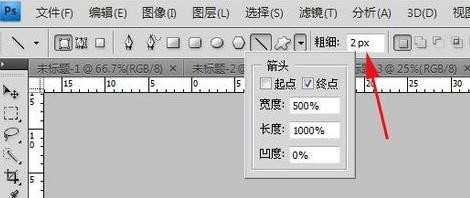
8、当然,还可以根据自己的需要调节箭头的粗细
以上就是photoshop简单制作箭头方法介绍,操作很简单的,大家学会了吗?希望这篇文章能对大家有所帮助!