Photoshop设计制作逼真的雪花立体字
平面设计 发布日期:2025/2/19 浏览次数:1
正在浏览:Photoshop设计制作逼真的雪花立体字
这里给大家制作的是一个雪地字体教程,用是PS3制作的,此教程很简单,只要大家按照步骤去做就可以了,不需要多考虑什么,当然,你想要运用到其它地方,就要靠大家的脑袋了。
这个图的原图是1942X1675做的,所以源文件是非常清晰的,网站上面的图片是600X400的。先下载素材:纹理和字体
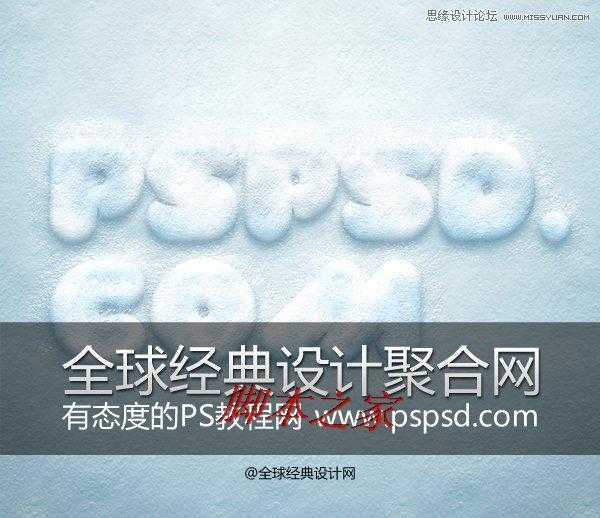
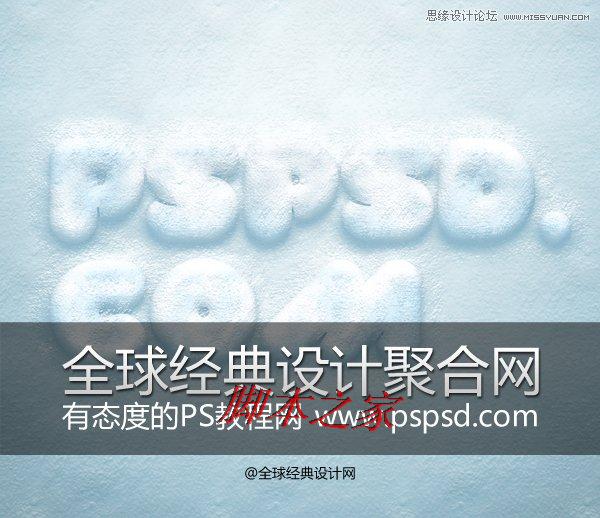
最终效果图:

第1步:
背景设为白色,然后CTRL+J复制一层,双击图层,打开图层样式。操作如下:(记得把纹理下载并载入到PS里面,这里怎么载入我就不多说了)
-斜面和浮雕:
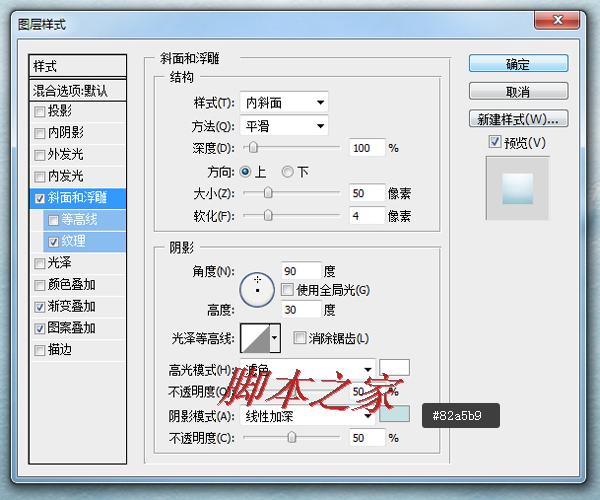
-纹理:

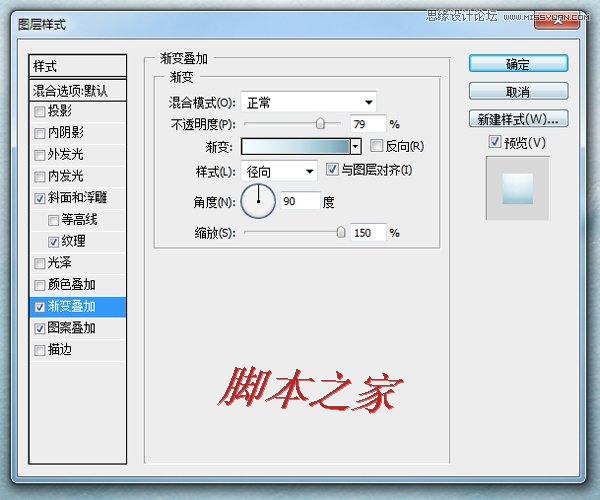
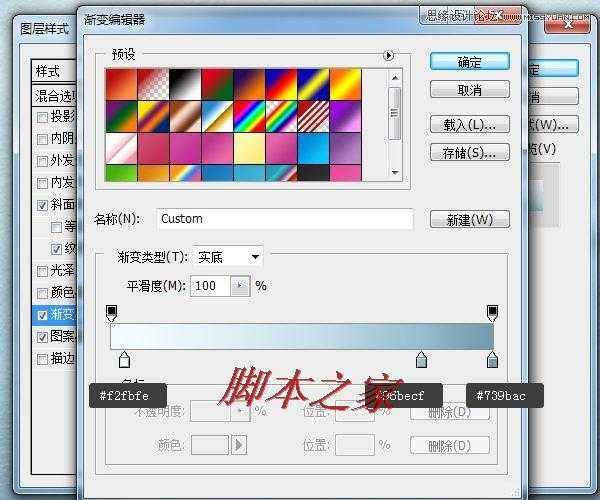
-渐变叠加:
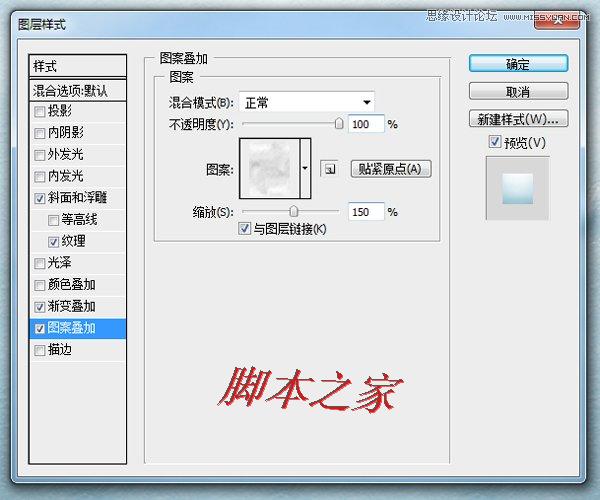
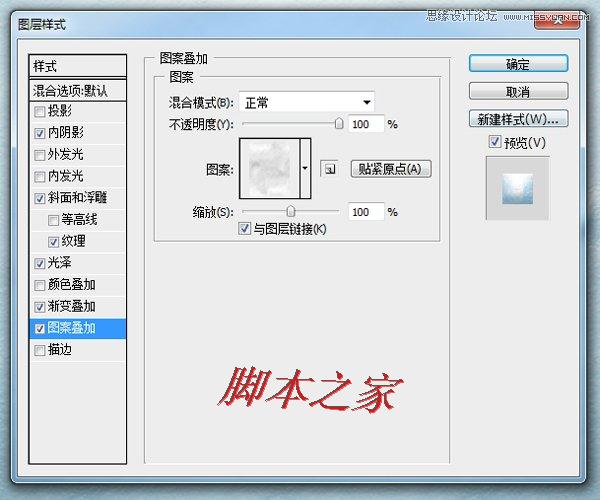
-图案叠加:
按照步骤做完后,将次图层等比拉大,让雪地铺满整个画布。这里我少上了一张图,因为大家做出来可能会不一样,但是只要把效果做了,拉大就差不多了。如下图:

第2步:
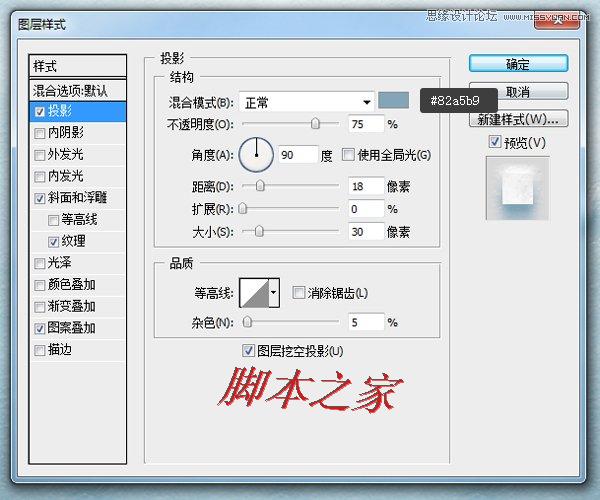
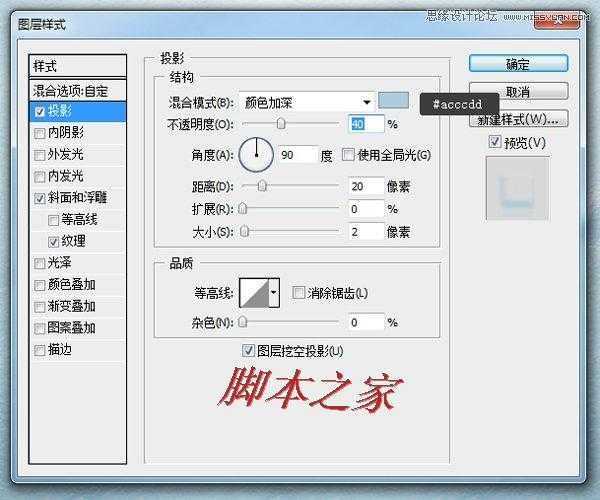
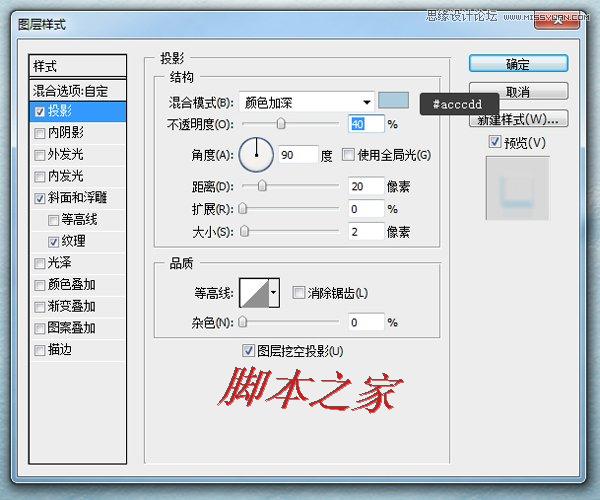
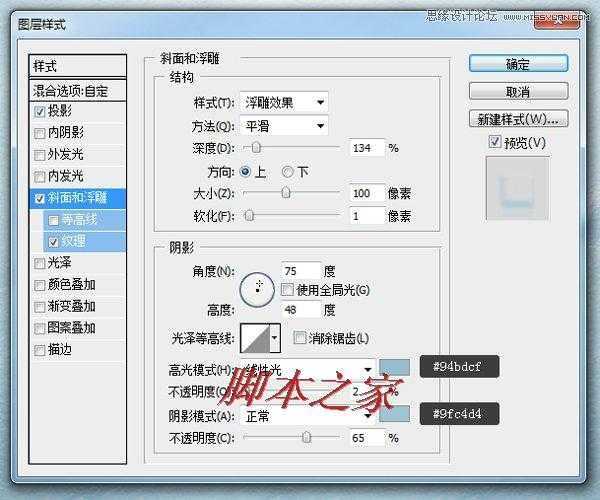
将字体设置好,我这里设置的字体大小是470。将该字体复制一层,将原有的隐藏,后面还会用到,复制出来的图层命名为“a”,然后双击,打开图层样式。
-投影
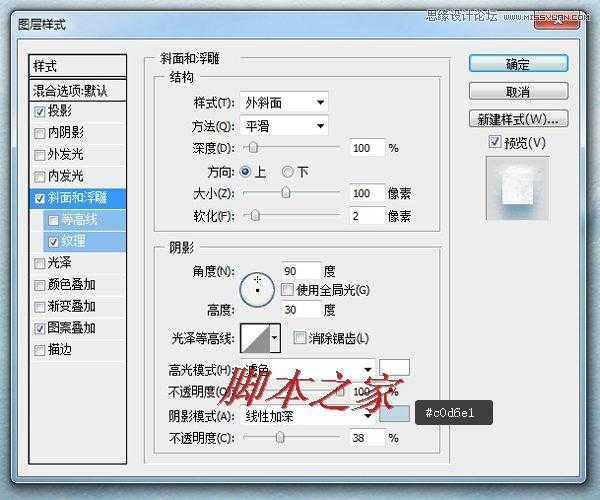
-斜面和浮雕:
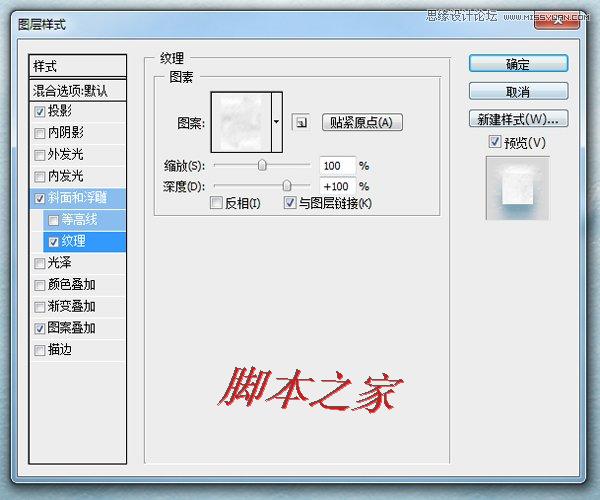
-纹理:
-图案叠加:

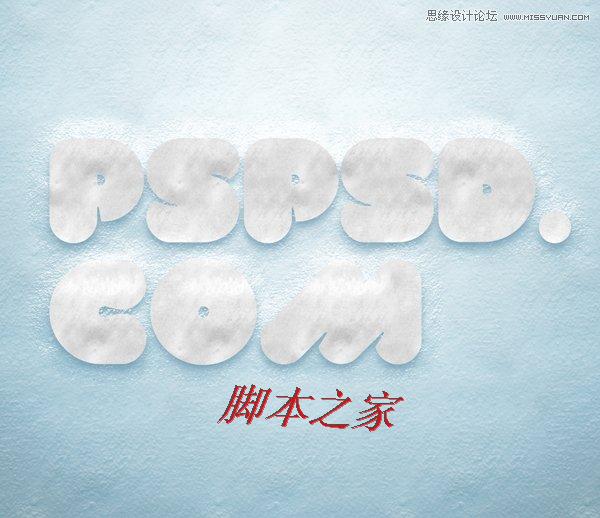
完成后的效果是:
第3步:
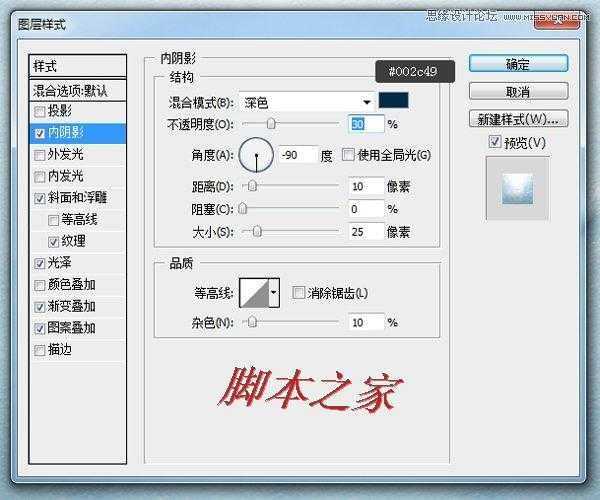
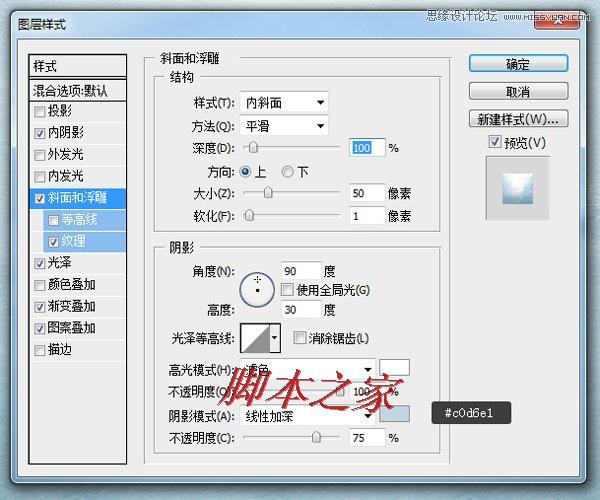
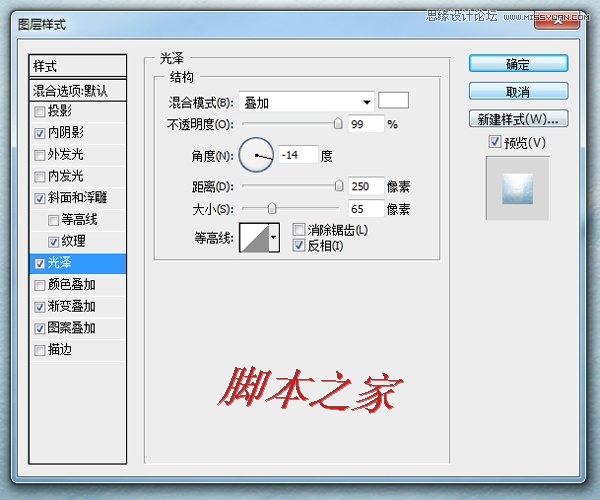
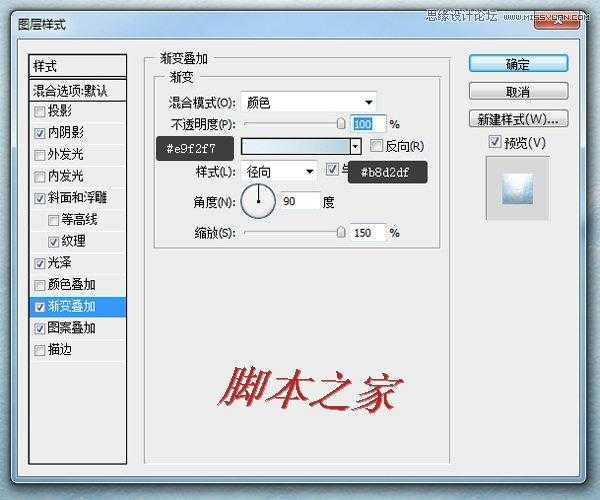
复制字体图层,然后拖到所有图层顶端,然后命名“b”。然后双击,设置图层样式:
-内阴影:
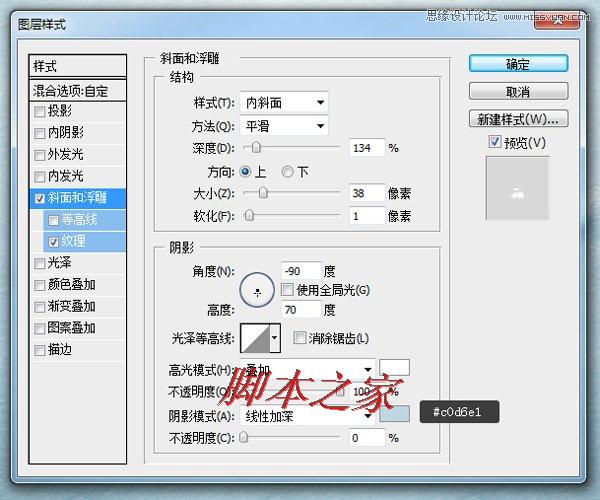
-斜面和浮雕:
-纹理:

-光泽:
-渐变叠加:
-图案叠加:
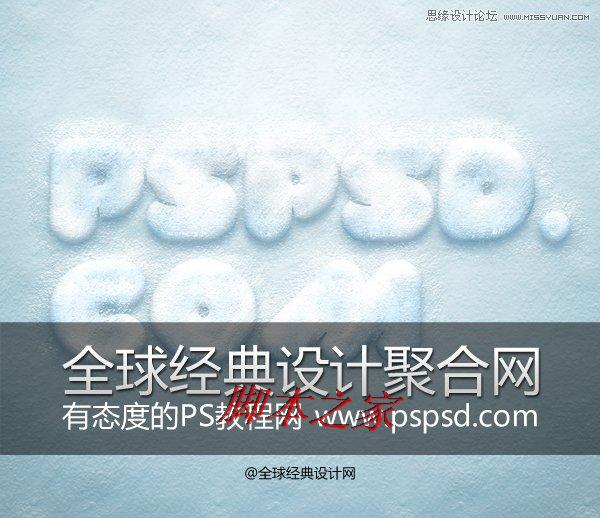
完成后的效果是:
第4步:
复制字体图层,然后拖到所有图层顶端,然后命名“c”。然后双击,设置图层样式:
-斜面和浮雕:
-纹理:

完成后的效果:
第5步:
复制字体图层,然后拖到所有图层顶端,然后命名“d”。然后双击,设置图层样式:
-投影:
-斜面和浮雕:
-纹理:
完成后的效果
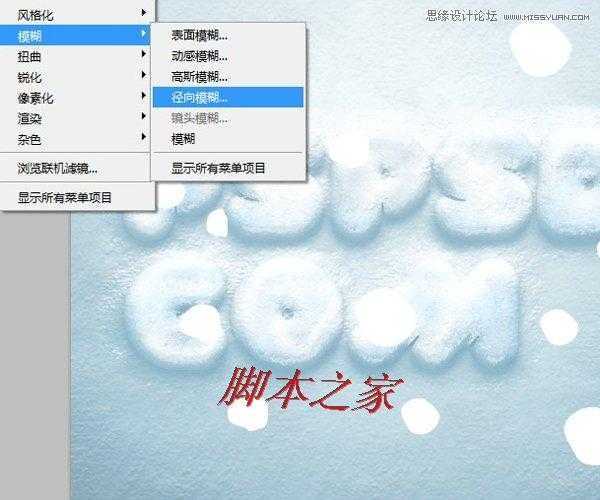
第6步:
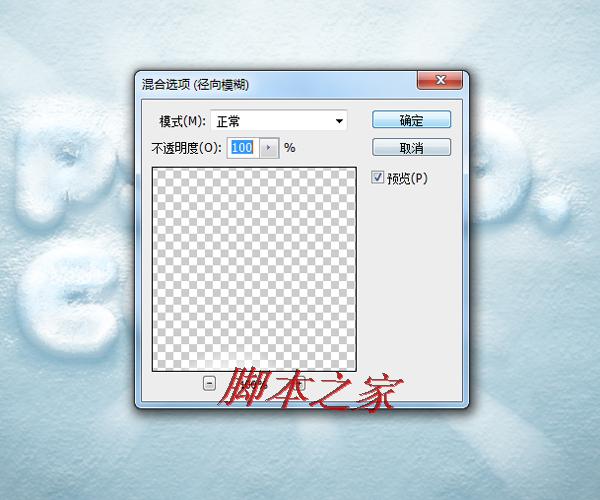
新建一个空白图层,然后用画笔工具在上面点几个圆,然后滤镜-模糊-径向模糊,设置如下:
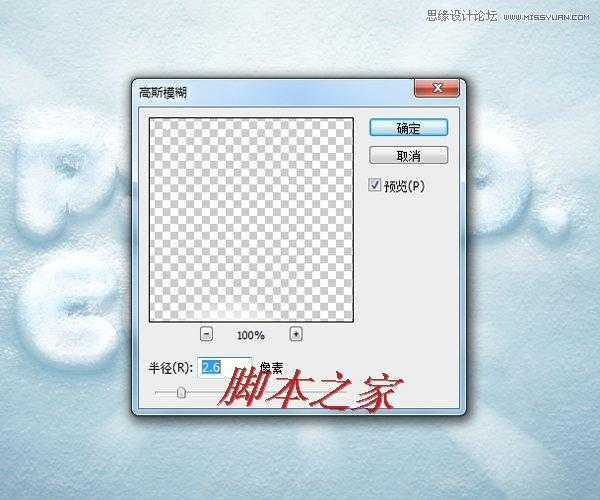
然后在通过刚才的方法选择“高斯模糊”:
做完后将此图层的透明度设置为:75%。
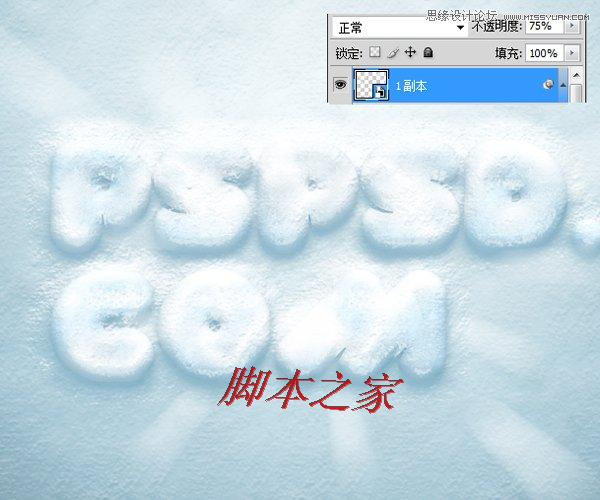
我们就完成了。
最终效果图:
这个图的原图是1942X1675做的,所以源文件是非常清晰的,网站上面的图片是600X400的。先下载素材:纹理和字体
最终效果图:
第1步:
背景设为白色,然后CTRL+J复制一层,双击图层,打开图层样式。操作如下:(记得把纹理下载并载入到PS里面,这里怎么载入我就不多说了)
-斜面和浮雕:
-纹理:
-渐变叠加:
-图案叠加:
按照步骤做完后,将次图层等比拉大,让雪地铺满整个画布。这里我少上了一张图,因为大家做出来可能会不一样,但是只要把效果做了,拉大就差不多了。如下图:
第2步:
将字体设置好,我这里设置的字体大小是470。将该字体复制一层,将原有的隐藏,后面还会用到,复制出来的图层命名为“a”,然后双击,打开图层样式。
-投影
-斜面和浮雕:
-纹理:
-图案叠加:
完成后的效果是:
第3步:
复制字体图层,然后拖到所有图层顶端,然后命名“b”。然后双击,设置图层样式:
-内阴影:
-斜面和浮雕:
-纹理:
-光泽:
-渐变叠加:
-图案叠加:
完成后的效果是:
第4步:
复制字体图层,然后拖到所有图层顶端,然后命名“c”。然后双击,设置图层样式:
-斜面和浮雕:
-纹理:
完成后的效果:
第5步:
复制字体图层,然后拖到所有图层顶端,然后命名“d”。然后双击,设置图层样式:
-投影:
-斜面和浮雕:
-纹理:
完成后的效果
第6步:
新建一个空白图层,然后用画笔工具在上面点几个圆,然后滤镜-模糊-径向模糊,设置如下:
然后在通过刚才的方法选择“高斯模糊”:
做完后将此图层的透明度设置为:75%。
我们就完成了。
最终效果图: